Setup for city of San Francisco
Sick
Leave Ordinance
You must perform several setup steps in order to
‘activate’ the San Francisco Sick Leave program. These steps include:
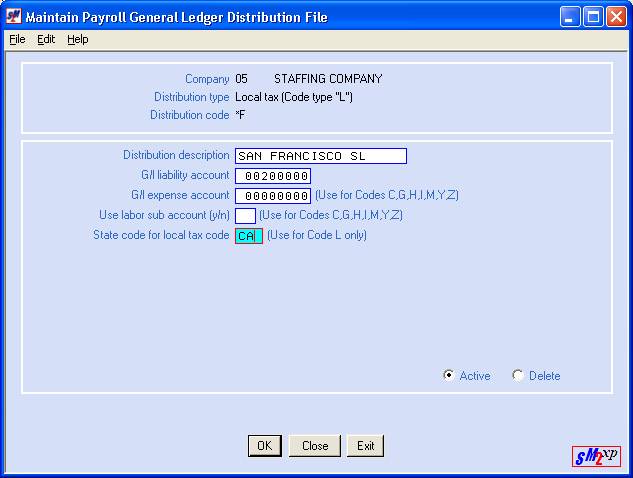
1) Adding a new Payroll GL distribution local tax code of
*F
2) Setting up a new local tax table for *F
3) Adding a response to the PR System Requirements
4) Adding 91 to the Sick leave days in each participating
employee’s file
5) Adding *F as a local tax code to every participating
job order
6) Optionally adding *F as a default tax code to either
the PR System Requirements file, or to each San Francisco customer file.
7) Optionally create a new Labor Distribution to expense
the Sick leave wages to a different wage expense account.
Continue reading below for detailed instructions on performing
the steps listed above.
Step 1: In the
Pay and Bill library, go to the File Maintenance menu.
Select
Payroll GL Distributions.
Add Local
Tax, using distribution code *F, using whatever GL account number you choose.
(No dollars will ever post to this account.
Step 2: Next,
while still on the File Maintenance menu, select FIT, State, Local Tax tables.
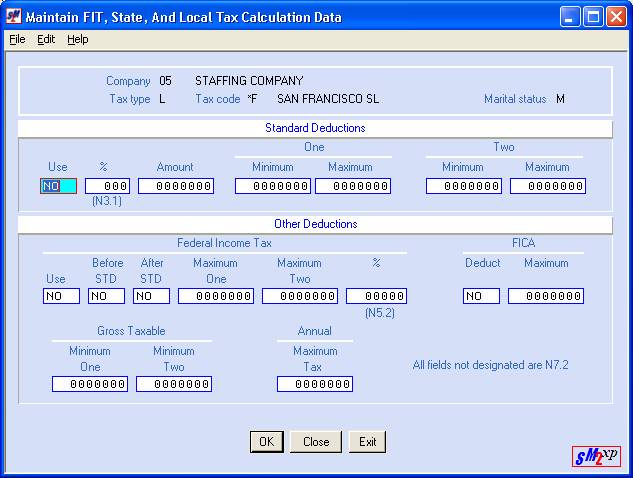
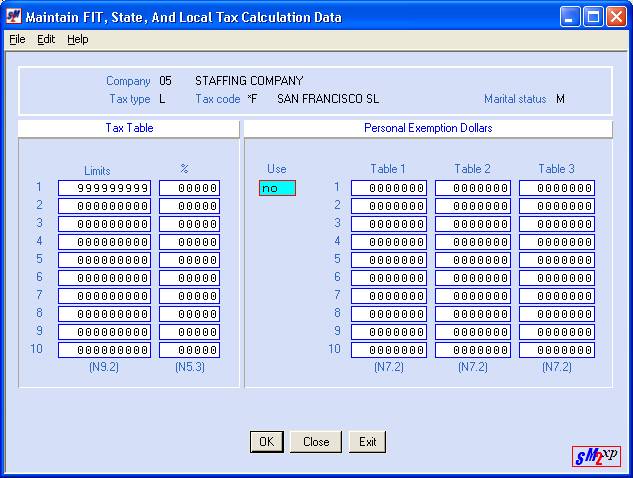
Create a
Married and Single record for Local Tax code *F that match the following
screens:
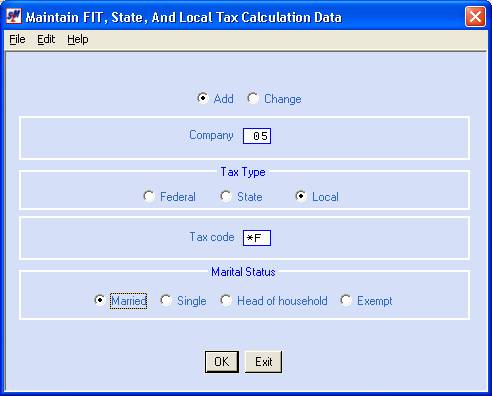
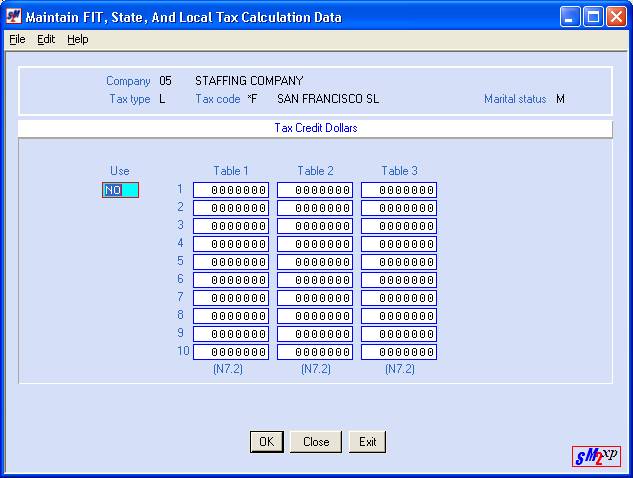
Repeat for Single
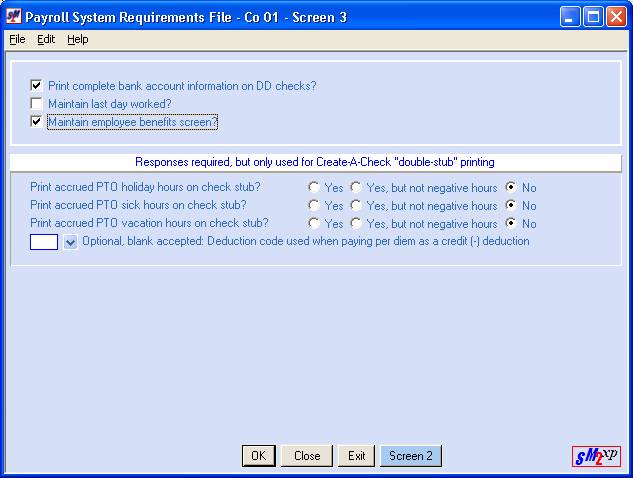
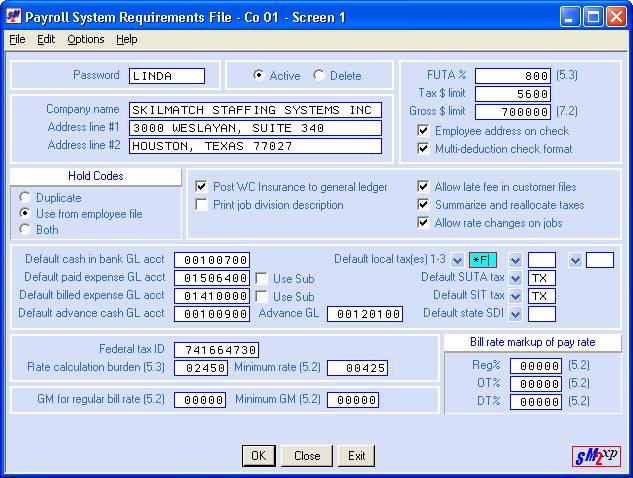
Step 3: Next, while
still on the File Maintenance menu, select Payroll System Requirements.
Bring up
the file for your G/L Company, and continue to click [OK] until you reach
Screen 3.
Check the box marked ‘Maintain
Employee Benefits Screen.
If you are a Create-A-Check user,
you may also want to print the accrued PTO sick hours on the CAC check
stub. Choose from Yes, Yes except if
negative, or No.
Click [OK] after all choices are
made.
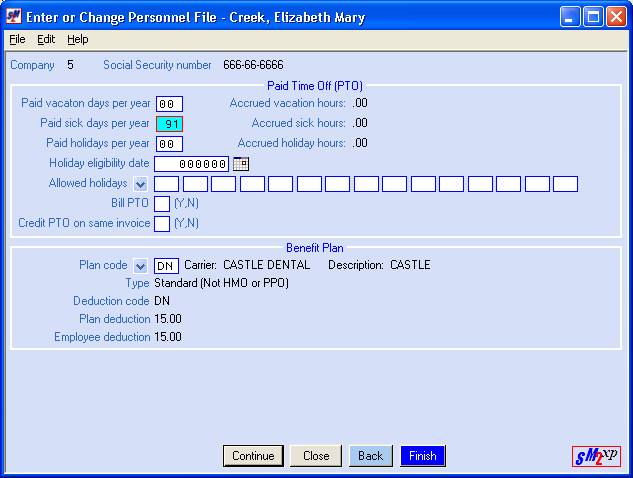
Step 4: Bring up an employee’s file through Maintenance, or the Name Search.
Update the employee file by keying ‘91’ as the Paid sick days per year on the PTO screen.
As long as the 91 displays in this area, the system will accumulate the necessary sick time.
If there is a ‘lapse’ when you do not want the employee to accumulate time, remove the 91 from this area.
If you want to show the customer
that you are paying this Sick Leave benefit to your employees, key Y to
both the Bill PTO and Credit PTO areas. Answering Y to both will,
in effect, demonstrate to the customer that you are indeed paying the benefit
to the employee, but without ultimately billing the customer, since both the
billing and the credit will appear on the same invoice.
If you do not want the Sick
Leave PTO payment to be reflected in the invoice, key N to both the Bill
PTO and Credit PTO areas.
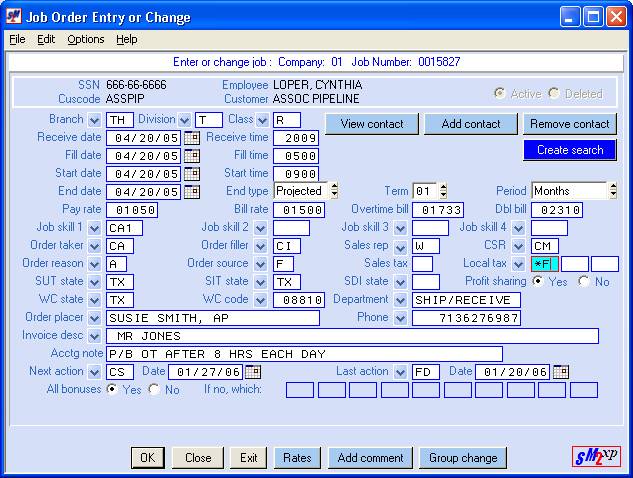
Step 5: Every
employee who will participate must have *F as a local tax code on the jobs for
which they are paid.
Go into every existing job that
is eligible for the SF Sick Leave and add *F into any one of the three Local
Tax areas.
Step 6: (optional) If you want the *F to be added automatically to future job orders, you must set it as a default in one of two places. To add the *F to EVERY job order, add the *F to the Payroll System Requirements file:
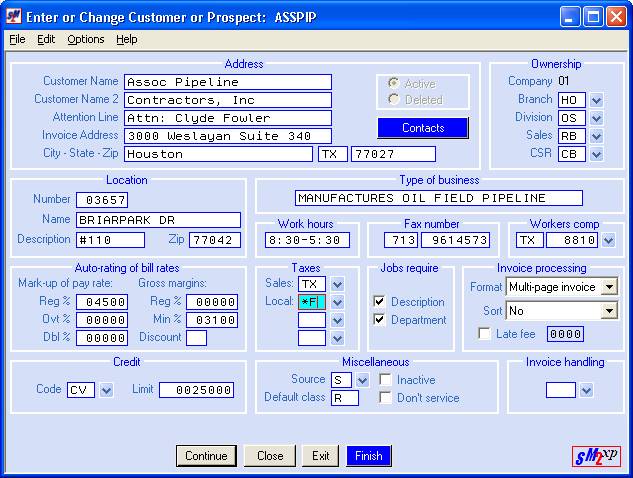
If you do not want the *F added to ALL jobs, just those for San Francisco customers, then you will not add it to the System Requirements, instead, you will add the *F to the Customer file.
Step 7: (optional) If you want to expense San Francisco
sick time to a special expense account, you will need to:
1) create a unique Labor
Distribution,
2) add a job order using this
unique Labor Distribution, and
3) process a separate ‘timecard’
against this job.
Please call SkilMatch if you need assistance in creating a
new Labor Distribution.
Paying SF Sick Leave:
If you plan to expense the SF Sick leave wages to the same
wage account as the regular job, you may add the Sick time payment to the
regular weekly timecard off of the employee’s regular job. If you have created a new Labor Distribution
to expense the wages to a different account, then you must add a separate
job order and process a separate timecard against the Sick Leave job.
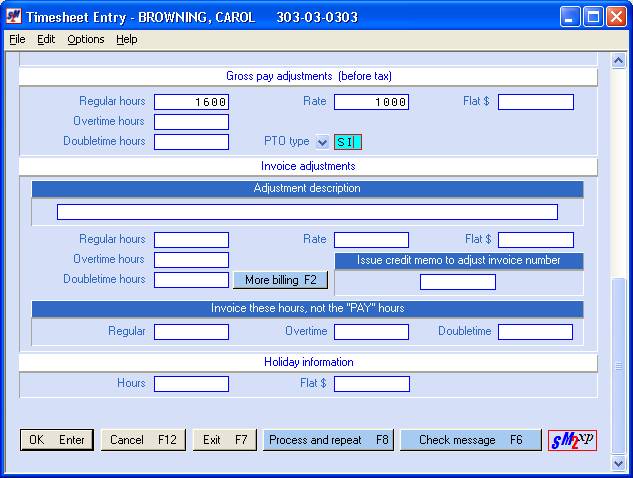
Regardless of the job order used, however, San Francisco
Sick time should be paid as a Gross Pay Adjustment (hours x rate) on a
timecard, using SI as the PTO code. See
example below:
If you use Create-a-Check, then this will print separately
on the check stub, as will the accumulated sick leave benefit. If you do not use Create-a-Check, then we
recommend that you add a special check message to the timecard to identify the
‘Other pay’ that will print on the check stub.