CHECKS
PAYROLL TAXES ARE AUTOMATICALLY CALCULATED (or recalculated) when this CHECKS option is processed.
If you receive an error message during tax calculation portion of this process, please refer to CALCULATIONS (Menu PBPROC, Item Calculations) documentation to review options.
This ‘Checks’ option includes the following:
1) Calculate taxes, deductions, net pay and invoice amounts
2) Verify check printing data
3) Verify direct deposit data and select settlement date (optional)
4) Create print file of checks
5) Laser printing instructions (optional)
6) Add checks to bank reconciliation
7) Create direct deposit file
You will be given a final opportunity to verify check-printing information during the processing of this option (during the “Begin Cycle”, the check-printing specifications were set up in the Payroll Constant file).
CRITICAL: After the print file of payroll checks is created, you will be asked to post the checks to the bank reconciliation file. You should not respond to this message until AFTER the checks have printed successfully!
Once you have posted the checks to bank reconciliation, you will receive a report verifying either all checks were successfully added to the bank reconciliation file or a list of the checks not added to the bank reconciliation file. Also, once you have answered YES to post the checks to bank rec, the system monitor will not allow you to process the Print Check option again during this payroll process.
“Create-A-Check” (CAC) is a software interfaced with SkilMatch to allow printing of payroll checks (as well as invoices, A/P checks, W2s, and more) using specific types of laser printers. You must purchase the CAC interface and SkilMatch staff must set it up for you before it will be active during your payroll. A special toner cartridge is required, as well as specific check stock. CAC check stubs will contain more detail than a non-CAC check stub.
The CAC stub will include extra items not printed on the standard pay stub. The additional items include:
· The ‘to-date’ dollars for deductions
· The pay rate for each type of hours paid (regular, overtime, double time, and pay adjustments)
· Year-to-date tax dollars withheld from the employee for all states and localities (even if there were no dollars withheld from this check)
· Any ‘extra’ tax being withheld for a state or locality,
· PTO (paid time off) accumulation, if your organization uses this feature
· Per diem dollars will print in a designated location (if per diem has been set up as a designated deduction)
SkilMatch customers are divided into 2 groups: those who lease space on the SkilMatch/E (SM/E, Web-based) server, and those who own a server. Make certain before proceeding that you know your group. There is a separate set of steps for SM/E users.
Direct Deposit:
If you are using the direct deposit programs, the preliminary direct deposit file is created at the time the checks are added to bank reconciliation file. If any pre-notes are due to be sent, then that file will be created at the same time. (This direct deposit file is what you download to the PC and transmit to the bank). The employee bank account information is picked up at this time. Any changes that are made to the employee’s bank account data after checks have been posted to bank reconciliation will NOT be in effect for the current direct deposit transmittal.
If you process multiple payrolls whose direct deposit data will be transferred together as a single transmittal file, then the direct deposit payroll data for each subsequent payroll for that G/L Company will be added to the existing preliminary direct deposit file.
Note: pre-notes
are created only when the first payroll is processed, not when additional
payrolls are added to the direct deposit file.
Any new pre-notes will not be pulled until the existing direct deposit
file has been downloaded to the PC and transmitted to the bank.
You will receive a report of the direct deposit data that is a part of this payroll process. Direct deposit checks print with your other checks but are marked VOID.
In addition to the 7 reports created by the calculation, there are 2-4 print files produced by the print check portion.
DD030 – which lists any Direct Deposit errors
PB440d – the actual check file
PB444 – which lists any check numbers not added to bank reconciliation
DD060 – the preliminary direct deposit for this payroll only
The following is a list of the different features described in this documentation:
Printing Create-A-Check checks
Printing checks to a dot matrix printer
To begin, select the [Payroll Processing] menu in the Pay and Bill library.
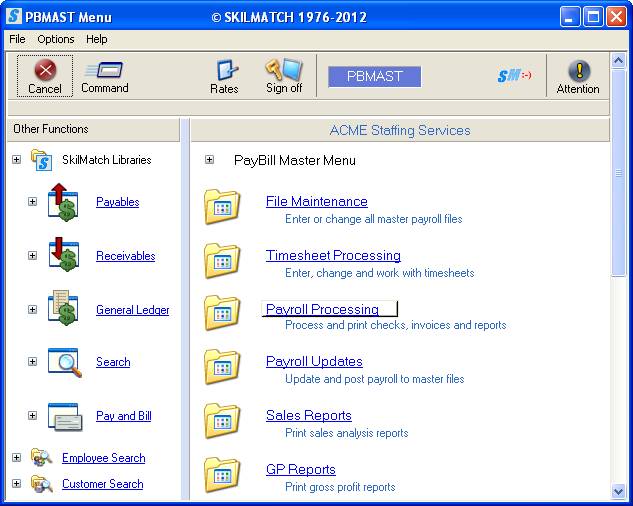
The screen will display:
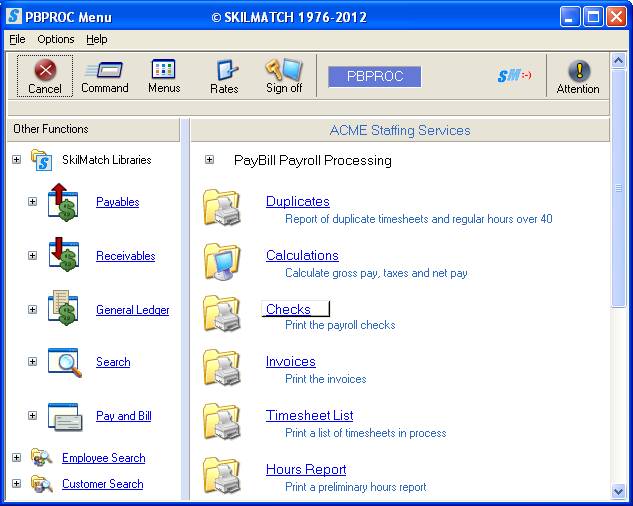
Click [Checks], the screen will display:
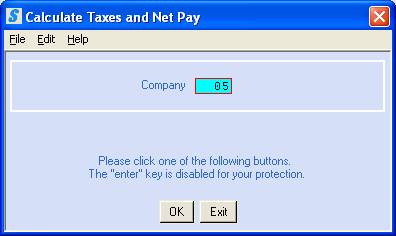
Company Number:
Defaults to company 01. To print the checks for a different company,
key the desired company number.
To continue, click [OK].
NOTE: The system NO LONGER allows pressing the <Enter> key as an option to proceed. This screen requires users to make a conscious decision to click [OK].
OR
To cancel printing checks, click [Exit]. You will be returned to the “PayBill Payroll Processing” menu.
If you select [OK] to continue, the net pays will be monitored for negative amounts and gross pays will be monitored for gross exceeding $12,000.00, direct deposits will be validated, the system will check for duplicate voids and the system will monitor for Medicare gross pay over $200,000. If the system locates problems with any of these, an error message will display on your screen.
You must make corrections before proceeding. Refer to online documentation Menu PBPROC, Item Calculations for instructions.
If no problems are found, the screen will display:
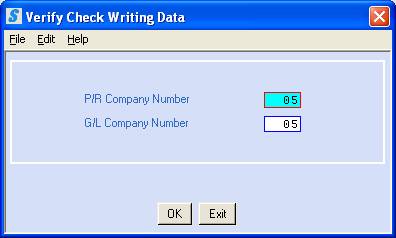
Payroll Company Number:
The screen will default to the
same company number that was used for prior screen ‘Calculate Taxes and Net
Pay’. This company contains the
employee, customer and job order files.
OR
To print the checks using the
files from a different payroll company, key the desired payroll company number.
General Ledger Company Number:
The screen will default to the
same company number that was used for ‘Calculate Taxes’. This company number will receive the journal
entry for the costs associated with the payroll. For most SkilMatch customers, the G/L company is the same number
as the Payroll Company.
OR
To post the payroll expense to a
different general ledger company, key the desired general ledger company
number.
To continue, click [OK].
OR
To cancel printing checks, click [Exit].
If you select [OK] to continue, the screen will display:

The screen will display choices made previously on the Payroll Constant file, and on the Payroll System Requirements file. Please verify once again that the check number and check date are accurate. Any changes you make to the ‘Check message Line 1 or 2’ will be a one-time change affecting this payroll only. Future payrolls will revert back to the default message in the Payroll Constant file. Make any desired changes on this screen.
To continue creating the print file of checks, click [OK].
OR
To cancel, but wish to try again with a different payroll company number and/or a different general ledger company number, click [Stop, don’t print checks]. You will be returned to the Verify Check Writing Data screen. From this menu, to cancel the “Checks” option and return to the “PayBill Payroll Processing” menu, click [Exit].
If you select [OK] to continue, the check writing data will be verified. If you use the direct deposit programs, the employee direct deposit data will also be verified.
If you DO
NOT use the Direct Deposit interface, but DO use CAC for printing check, select this link to
proceed with CAC check.
OR
If you DO
NOT use the CAC OR Direct Deposit interface, proceed to posting of the
select this link to proceed with checks.
OR
If you DO
use the Direct Deposit interface, proceed with the instructions below.
Direct Deposit:
If you use the direct deposit interface, the following direct deposit process will occur.
Possible Direct Deposit Errors, if errors with the direct deposit data are found, you will receive a message on the screen and this program will be cancelled without producing a print file of checks.
You must review your report to identify the error and then make the necessary correction(s) before you can proceed. Once the corrections are made, process this option again.
When the direct deposit data is successfully verified, the screen will display:
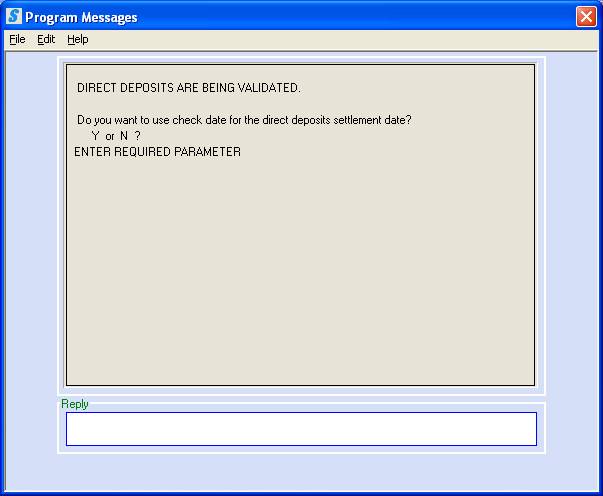
Do You Want To Use Check Date For The Direct Deposits Settlement Date?
“Settlement date” is the day the
bank will deposit the money into the employee’s bank account. For most of you, the settlement will be the
same as the check date. Many banks require
that you transmit the direct deposit file 2 days before the “settlement
date”. So, if your checks are dated
Friday, and you use the check date as the “settlement date”, then you would
need to transmit the direct deposit file on Wednesday. You CANNOT use a settlement that is after
the check date. The settlement date
must be on or before the check date.
If you want the bank to transfer the payroll to the employees' accounts the same date that the checks are dated, key Y and press <Enter>.
OR
If you want the bank to transfer the payroll to the employees' accounts on a different date, key N and press <Enter>.
If you keyed N, the screen will display:
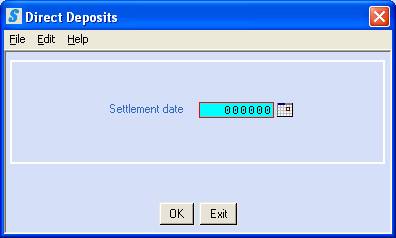
Enter Settlement Date:
Key the 6-digit date that the
bank should use for transferring the direct deposits, or use the ![]() button (prompt and select) to the right of
the date.
button (prompt and select) to the right of
the date.
To continue, click [OK].
OR
To cancel printing checks, click [Exit]. You will need to confirm that you canceled checks, and click [OK] on cancel confirmation screen. You will be returned to the main menu.
If you select [OK] to continue.
Checks on a dot matrix, continuous-form printer, or on a PC laser printer using pre-printed forms users will continue to the check printing, select this link to proceed with checks.
Create-A-Check users will receive the following message when printing checks (or see “possible system message” below if file already exists on PC File Server).
The screen will display:
 -
-
OR
POSSIBLE SYSTEM MESSAGE: Create-A-Check users may receive the following message if file already exists on file server.
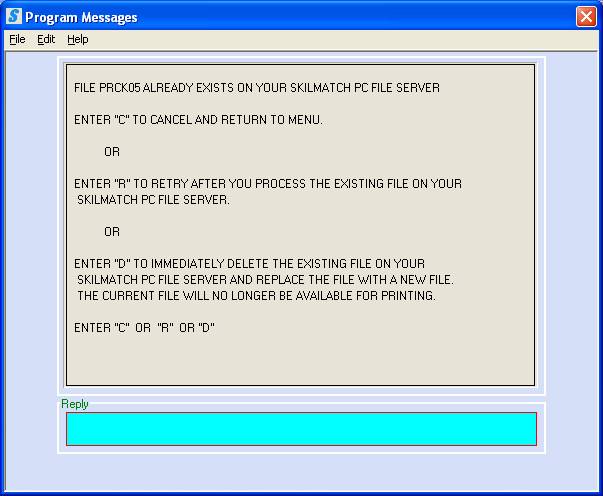
Possible Reasons for Receiving this System
Message:
1) User selected Checks menu option previously and did not print the checks in CAC
2) User had problems or PC lost connection during the check processing
3) Last payroll checks ran for this company number was not printed in CAC
Read through the system messages listed on the screen and review the steps taken in current payroll (have you cancelled and are rerunning this option?) OR if this is the first time you are running the checks option for this payroll and you received this message, review the last payroll for this company number. You should review the prior payroll and confirm that the CHECKS were printed via CAC and posted in your system. Call SkilMatch if you need assistance.
To Cancel,
If you are unsure as to why you received this message, call SkilMatch for assistance.
If you wish to proceed with canceling the check option and return to Payroll Processing menu, key C and press <Enter>.
OR
To Retry,
If you are unsure if you printed the last payroll checks in CAC (see reason #3 above),
Leave this system message screen as is,
Go to CAC and review the PRCKXX (XX=Company #) file.
If this check file HAS NOT been printed in CAC and needs to be printed, print the checks now.
When check printing is complete, return to the system message screen shown above to Retry this option, key R and press <Enter>.
The system will attempt to place the new PRCKXX file on the PC file server.
NOTE: If the previous file was cleared and the NEW file can be copied on the PC file server, the system will proceed and screen below will display.
OR
IF NOT, you will again receive the option to Cancel, Retry, and Delete.
OR
To Delete the current file,
If you confirmed that the PRCKXX file can be deleted (see reason #1 and #2 above),
Respond “D” to delete the existing file and replace with the new payroll file. key D and press <Enter>.
If you key D and press <Enter>, to Delete and Replace the existing file, the screen will display:
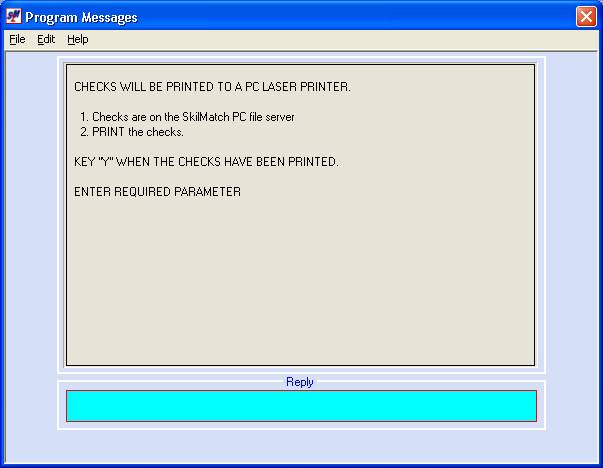
CAC users, proceed with instructions for printing checks on Create-A-Check forms, select this link to detailed instruction for CAC.
When checks have
been printed successfully in CAC, return to the system message above and
respond Y that the checks
have been printed.
Key Y, and press <Enter>.
The following
screen will display:
Add Checks To Reconciliation File:
If you select [OK] to continue creating the check file or keyed Y that CAC checks have printed, the screen will display:
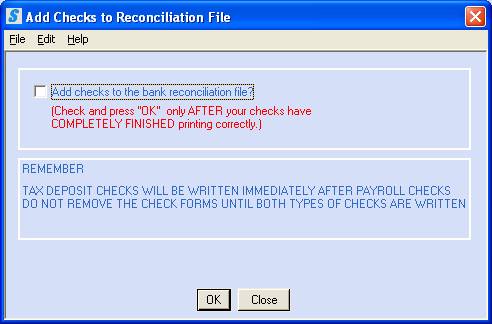
Do NOT answer this question until your checks have finished printing. Do not add the checks to bank reconciliation until they have COMPLETELY finished printing.
CAC users, the check printing process should be complete, if not, select this link for detailed printing instruction using CAC.
OR
Dot matrix, continuous-form printer, or PC laser
printer using pre-printed forms users that are printing
checks, select this
link for detailed instructions for printing checks How To
Print.
Once your checks have finished printing (this means
the printer has printed the last check – you encountered no jammed checks) and
you have verified the check number, check date, and alignment), you should add
checks to the bank reconciliation file by clicking once to display a
checkmark and then clicking [OK]. You will return to menu.
OR
If you WILL NOT add the checks to the bank reconciliation file, do not add a checkmark, and click [OK], or click [Close], the screen will display:
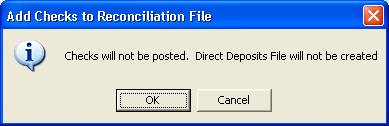
If you arrived at this screen in error and DO want to post checks to the bank reconciliation file, click [Cancel] to return to the Add Checks to Reconciliation File screen.
OR
If you do NOT want to post checks to the bank reconciliation file, click [OK] to confirm your choice.
If you posted checks to the bank reconciliation
file, you will receive a report titled "Duplicate Checks in Reconciliation
file" (PB444). A message on the
bottom of the report should read: ALL
CHECKS WERE ADDED TO THE RECONCILIATION FILE.
If you do not see this message, this report will show any checks NOT added to the bank reconciliation file because of a check already in the system with the same number. Call SkilMatch staff for advice.
Direct Deposit:
If you use the direct deposit programs, and if you paid any employees who are participating in this program, then the system created a preliminary direct deposit file when the checks were added to bank reconciliation.
If any employees had a pre-note status and the pre-notification date was prior to or the same as the week-ending date of the check being processed, then an additional file was created of pre-notes. Pre-notes are pulled for ALL employees, not just those who have a timecard in this payroll.
You will receive a report (DD030) confirming there were no errors with the direct deposits. You will also receive a report containing detail about the direct deposit records in this payroll.
Note: For a
COMPLETE list of the direct deposits currently in the preliminary file (if you
have processed more than one payroll for this company number, this report will
list ALL direct deposits processed since the last direct deposit file for this
company number was downloaded to the PC and transmitted to the bank), refer to
document Menu
PBPROC, Item Pending Deposits.
Printing the Actual Checks:
For assistance with printing
checks on a dot matrix, continuous-form printer, or on a PC laser printer using
pre-printed forms, refer to document How To Print.
For assistance with printing checks on a PC laser printer using Create-A-Check forms, refer to document CAC.
Reprinting An Original Check:
If you print checks to a laser printer, you may be able to reprint a check from the PC laser printer program. For assistance reprinting the checks to a PC laser printer, please call the SkilMatch technical department.
If you do NOT print checks to a
laser printer or if the check needing to be reprinted no longer exists in the
laser printer program, you may NOT reprint a check. You should void and reissue the check or replace it with a manual
check.