Creating State W-2 files and Optional State Magnetic
Media files:
You will need to create a set of state W-2s for each combination of G/L company/state with earnings. Please repeat these instructions for each combination.
To begin,
select the [End-of-Year] menu in
the Pay and Bill library. The screen
will display:
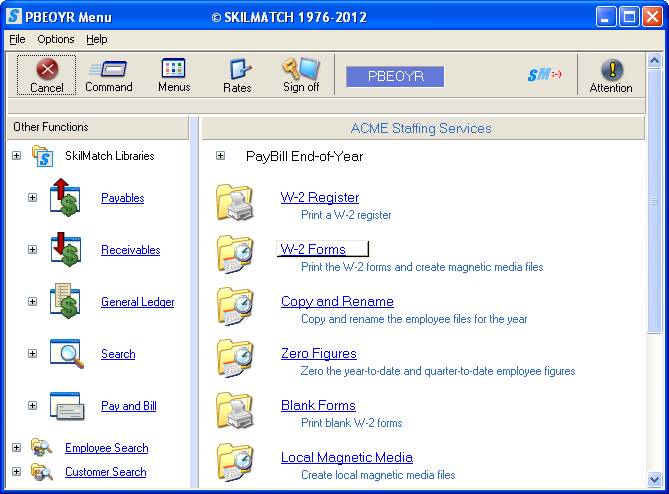
Select [W-2 Forms].
Screen will display:
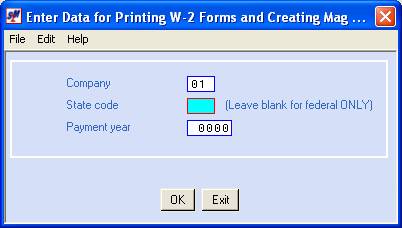
Company Number:
The system defaults to company 01. If you wish to produce W-2 forms for another
company, key the desired company number.
State Code:
Key the state code.
Payment Year:
Enter the 4-digit year whose earnings you are
printing. (2013, 2014, etc.)
To continue, click [OK].
OR
To cancel and return to main menu, click [Exit].
If you select [OK]
to continue, there will be a short delay, then the screen will display:
Screen images and examples in document may not reflect current law; always verify rates and figures with government officials and/or accounting professional.
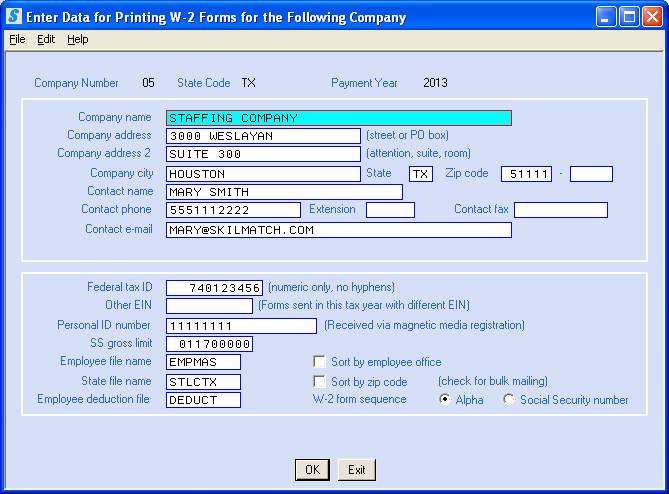
If you have processed this option
for this G/L Company/State/Year previously, then the system will display the
last selections you made. If you have
not processed this option previously, then many, but not all, of the areas will
be filled in for you, using data from the system set-up files.
Make necessary corrections to
existing data and enter the appropriate data in the remaining areas.
Remove any special characters. SSA file specifications prohibit them.
Company Name:
Will display as it appears in the payroll system requirements file (Menu Maintenance, Item Payroll System Requirements). Examine carefully for accuracy.
Make any necessary corrections
or key the data if missing.
Note: Make certain that there are no commas, hyphens, # signs,
apostrophes, etc. in your name.
Company Address (Street or
PO Box):
Will display as it appears in the payroll system requirements file (Menu Maintenance, Item Payroll System Requirements). Examine carefully for accuracy.
Make any necessary corrections
or key the data if missing.
Note: Make certain that there are no commas, hyphens, # signs,
apostrophes, etc. in your name.
Company Address 2 (Attn,
Suite, or Room):
Will display as it appears in the payroll system requirements file (Menu Maintenance, Item Payroll System Requirements). Examine carefully for accuracy.
Make any necessary corrections
or key the data if missing.
Note: Make certain that there are no commas, hyphens, # signs,
apostrophes, etc. in your name.
Company City:
Key the city for your company address. Examine carefully for accuracy and make any necessary corrections.
State:
Key the state for your company address. Examine carefully for accuracy and make any necessary corrections.
Zip Code:
Key the zip for your company address. Examine carefully for accuracy and make any necessary corrections.
Contact Name:
Key up to 27 characters of name the social security administration should contact with questions about this data. Examine carefully for accuracy and make any necessary corrections.
Contact Phone:
Key the business phone number belonging to the contact name. Examine carefully for accuracy and make any necessary corrections.
Contact Ext:
Key the extension number, if applicable. Examine carefully for accuracy and make any necessary corrections.
Contact Fax:
Key a fax number for the contact person, if desired. Examine carefully for accuracy and make any necessary corrections.
Contact Email:
Key a valid email address for the contact person, if desired. Examine carefully for accuracy and make any necessary corrections.
Note: If you
select to notify via e-mail, you MUST key a valid email address for the contact
person.
Federal Tax ID:
Will display as it appears in the payroll system
requirements file (Menu Maintenance, Item Payroll System Requirements). Examine carefully for accuracy. Make any necessary corrections or key the
data if missing.
Note: Make certain there are no hyphens or letters in this field or your federal ID will not be written to magnetic media correctly.
Other EIN:
If you have submitted forms for this same tax year
under a different EIN than the one entered in the Federal Tax ID area, key the
other EIN here.
Personal ID Number/User ID:
Key your User ID registered with the Federal
Government. Examine carefully for
accuracy. Make any necessary
corrections or key the data if missing.
This number had previously been referred to as the
PIN by the SSA Website.
Note: The federal
government requires that a User ID be included with W-2s being submitted on
magnetic media. You should already have
registered for this User ID with the SSA.
FICA Gross Limit:
Defaults to the FICA gross limit from the FICA tax
file (Menu PBMANT, Item FICA Tax Table).
Note: If you print W-2s after you have begun a new payroll year and
have already changed the limit for the new year in the FICA tax table, you will
need to key last year's dollar limit here.
Any change made here does NOT affect Menu PBMANT, Item FICA Tax Table.
Employee File Name:
Examine carefully for accuracy and make any necessary corrections.
The current year file name is EMPMAS.
OR
If you process this option AFTER processing
‘Copy and Rename’ and ‘Zero Figures’ you will need to change this file name to EMASxx
(where xx = the last 2 digits of the W-2 year).
State File Name:
Examine carefully for accuracy and make any necessary corrections.
The current year file name is STLCTX.
OR
If you process this option AFTER processing
‘Copy and Rename’ and ‘Zero Figures’ you will need to change this file name to SLTXxx
(where xx = the last 2 digits of the W-2 year).
Employee Deduction File:
Examine carefully for accuracy and make any necessary corrections.
The current year file name is DEDUCT.
OR
If you process this option AFTER processing
‘Copy and Rename’ and ‘Zero Figures’ you will need to change this file name to DEDUxx
(where xx = the last 2 digits of the W-2 year).
Sort By Employee Office:
Defaults to no.
OR
To sort the W-2s by the branch office code that
appears in the employee file, click once on the option to select (a checkmark
will appear next to the selection).
Note:
Sort by employee office only if you do NOT plan to use a bulk mailer,
and want each branch to mail/distribute their own W-2s.
Sort By Zip Code: (check for bulk mailing)
Defaults to no.
OR
To sort the W-2s by employee zip code, click once
on the option to select (a checkmark will appear next to the selection).
Note: If you plan to use
a bulk-mailing permit, you should select to sort by zip code by clicking once
on the option to select (a checkmark will appear next to the selection).
W-2 Form Sequence:
The area defaults to sorting the W-2s in
alphabetical order. If you would rather
print the W-2s in social security number order, click the circle to move the
dot to this choice.
Before continuing, examine the screen carefully to make certain that
the correct data has been entered.
To continue with this report, click [OK].
OR
To cancel and return to main menu without saving changes, click [Exit].
If you select [OK]
to continue, since you are processing this option WITH a state code, the
screen will display:
Screen images and examples in document may not reflect current law; always verify rates and figures with government officials and/or accounting professional.
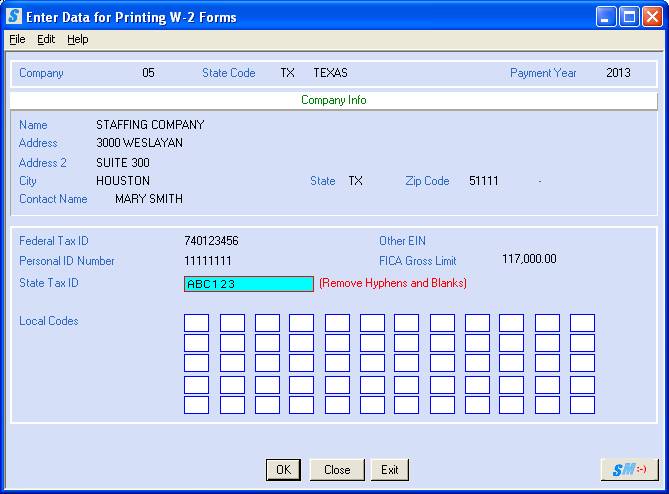
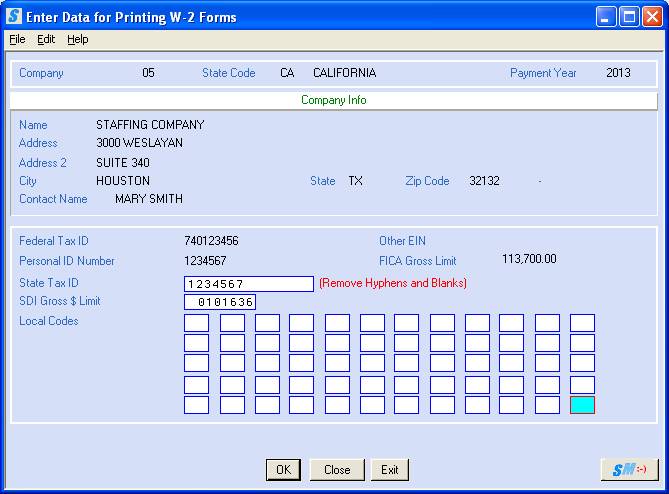
State Tax ID:
Defaults to the state tax ID in the state file (Menu PBMANT, Item State Information). Examine carefully for accuracy and make any necessary corrections.
Note: Make
certain no hyphens or blanks are entered or this will result in incorrectly
written magnetic media.
SDI Gross $ Limit (see screen below):
THIS FIELD ONLY APPEARS IF SDI – STATE DISABILITY
INSURANCE - IS WITHHELD FOR THIS STATE.
If you withhold SDI for this state, the dollar
limit will display from the state file.
NOTE: If you process
this option after you the new payroll year has begun, and have already changed
the limit, you will need to key last year's dollar limit.
New York Filers, Note: If you do business in
New York, you will have a custom SDI program.
When processing this option, enter 9999999 for SDI Gross $ Limit. The dollars calculated by the custom program
will be used.
Screen images and examples in document may not reflect current law; always verify rates and figures with government officials and/or accounting professional.
Enter Local Codes:
If the state displayed above has local tax(es)
withheld, key the valid tax code(s). You may enter a grand total of 120 local
codes - 60 per screen. Enter up to 60
local tax codes on this screen.
If you enter tax codes in all 60 areas on this
screen and choose to continue, the screen will display additional local tax
code fields.
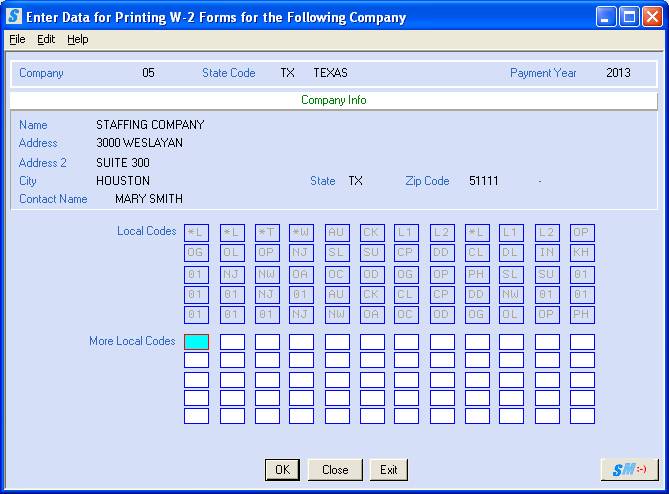
More Local Codes:
If you had more than 60 local codes to enter, enter
the remaining codes (up to an additional 60) on this screen.
Note: The system
will produce as many W-2s for an employee as required to print all local taxes
for that employee. If the employee has
more than one W-2 printed, there will be state tax printed only on the first
form, not on any of the subsequent forms.
To continue, click [OK].
OR
To return to the previous screen,
click [Close].
OR
To cancel and return to main menu without saving changes, click [Exit].
If you select [OK]
to continue, there will be a short delay, the screen will display:
FOR BULK
MAILING USERS ONLY
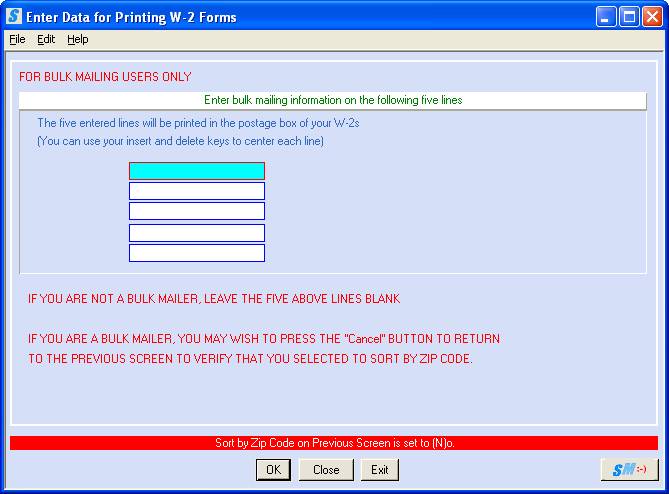
Note: If you are a bulk mailer, and you wish to verify/change how you
requested the sort sequence, click [Close] to return to the previous screen to
verify that you selected to sort by zip code.
If you are not a bulk mailer, leave the five
above lines blank.
OR
If you plan to use a bulk mail permit for mailing
W-2s, enter the bulk mailing information beginning on line 2 (the first line of
the self-mailer does not print adequately through the carbon). The data entered will be printed in the
postage box of your W-2s.
Note: You can use your insert and delete keys to center each line.
To continue, click [OK].
OR
To return to the previous
screen, click [Close].
OR
To cancel and return to main menu without saving changes, click [Exit].
If you select [OK] to continue, the screen will remain ‘input inhibited’ while the print file is created.
If you do not have the
Create-a-Check W2 program, click mag media to move
forward to the next screen.
Create-A-Check
W-2 users:
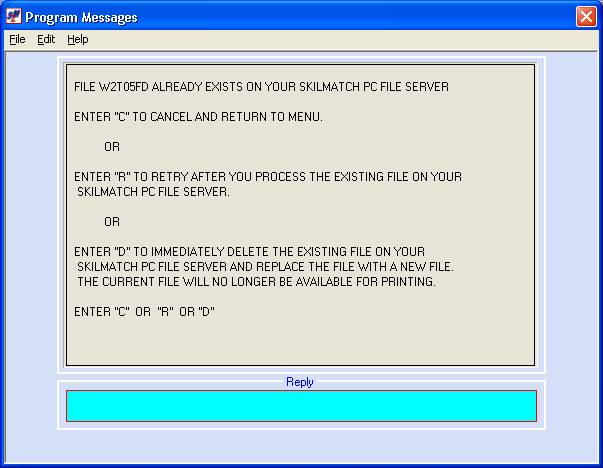
The system SHOULD NOT display the following screens. If you see one of these screens, then (1) you use Create-a-check W2s, (2) you have processed this option at least once for this company and state this year or in a previous year, and (3) you did not print the CAC W2s.
OR

If you received one of the screens displayed above, then you cannot continue until the existing W-2 file has been printed, or deleted, or renamed.
If you are already aware of this print file, and do not want to use the W-2s from this file, key ‘D’ and press [Enter].
OR
If you were not aware of this existing file, and do not wish to continue at this time, key ‘C’ and press [Enter]. You will return to menu. Investigate the existing file and take action to print the file, or rename the file or delete the file before attempting this option again.
OR
If you need to print the existing W-2s, but do not want to cancel ant start this process over again, you can let this message stay on your screen while you go to Windows Explorer and print the file. Return to this session afterwards, and respond with ‘R’. The system will verify that the W-2 file has been printed or no longer exists, and this option will continue.
If you are an SM/E customer, click SM/E to move to
your next screen.
If your organization
owns the server, then the next screen should display:
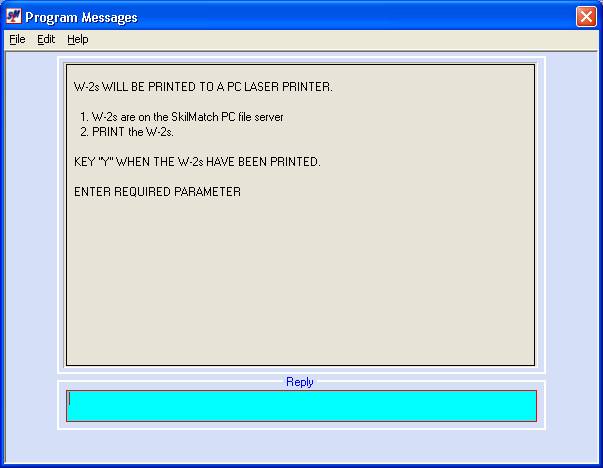
Despite
what the screen says, do not print the W-2s at this time. Go ahead and key Y and press [Enter]
to continue with processing.
You should wait until the SkilMatch technical department has modified the W-2 CAC software with the NEW YEAR changes.
Also, remember to update the YEAR in your CAC file before you print W-2’s.
If you are a SkilMatch/E customer, then the next screen will
display:

Despite
what the screen says, do not stop and print the W-2s at this time. Go ahead and key Y and press [Enter] to
continue with processing. You should
wait until the SkilMatch technical department has modified the W-2 CAC software
with the NEW YEAR changes.
Once you
have responded Y, the program will move on to electronic file creation.
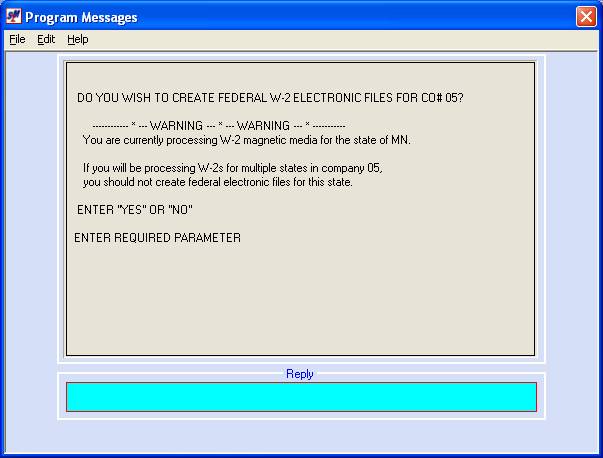
Since employee earnings are being reported to a multiple states for this company, you will NOT want to create a federal file with a state code.
Key NO and press [Enter] to continue.
The next
screen will confirm your choice to NOT create a federal file:
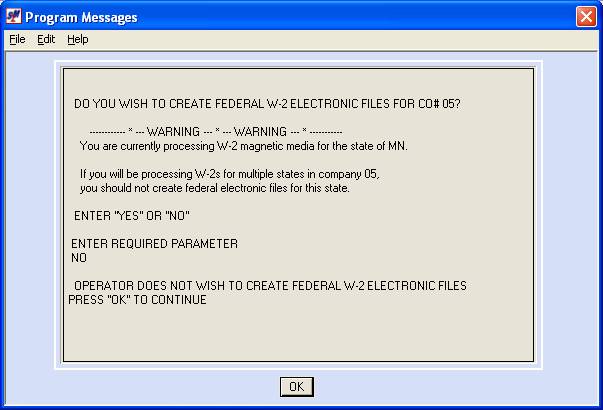
Click [OK] to continue, the screen
will display:
As of 2014, the following states
do NOT require that you report W-2 data to the state, either because there is
no state tax, or because you have been reporting quarterly data. Verify current requirements.
These states include:
Alaska
California
Florida
Nevada
New
Hampshire
Oklahoma
South
Dakota
Tennessee
Texas
Washington
Wyoming
Should your state require that you report W-2 data on
magnetic media, you need to know what format the state uses. Also, some states use a ‘generic’ format,
and others require a ‘customized’ format.
If there is an asterisk to the right of the state name, then the state has its own custom format. We have written a custom program for that state, unless noted otherwise. The following is a list of the requirements we are aware of at this time.
Note: We received one request to modify state
formats for reporting year 2014 – Maryland.
Alabama* MMREF
Arizona MMREF
Arkansas MMREF
Colorado MMREF
Connecticut* MMREF
Delaware MMREF
Georgia* MMREF
Hawaii (Unknown)
Illinois* MMREF
Indiana* MMREF
Iowa MMREF
Kansas MMREF
Kentucky MMREF
Louisiana MMREF
Maryland* MMREF
Massachusetts* MMREF
Michigan MMREF
Minnesota MMREF
Missouri MMREF
Montana MMREF
New
Hampshire MMREF
New
Jersey* MMREF
North
Carolina MMREF
Ohio* MMREF
Oregon* MMREF
Pennsylvania* MMREF
South
Carolina MMREF
Utah MMREF
Vermont MMREF
Virginia MMREF
West Virginia MMREF
*Indicates non-generic MMREF state format. Each of you has these custom programs on
your system.
Note: SkilMatch charges a conversion fee for each diskette produced.
Do not send diskettes to SkilMatch for the state conversion. SkilMatch will provide the necessary diskette(s).
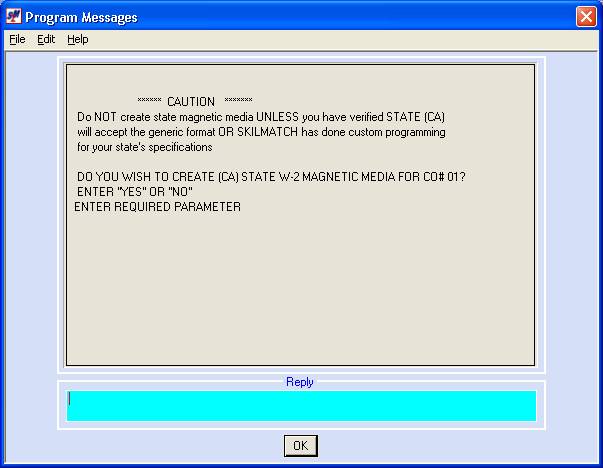
If you answered YES to create a magnetic media file for this state, the next screen will display:
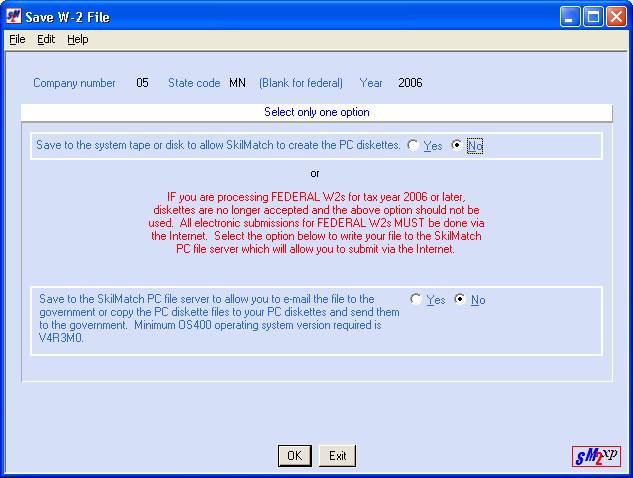
If you are allowed to transmit the state W-2 file to the state government electronically using the Internet, or if you want to create your own state MMREF diskettes, click save to PC File server.
OR
If you need SkilMatch to produce PC diskettes, click diskettes.