HOW TO
ENTER ADVANCE CHECKS
When a check is issued to an employee outside of a normal payroll process, this check can be called either an ADVANCE check, or a PREPAID check. These are two very different types of checks. For consistency, SkilMatch refers to an ADVANCE check as one where the amount is either a percentage of the gross, or is a very rough estimate of the net. A PREPAID check is one where a gross is calculated, individual types of taxes are calculated, and a net pay is calculated. A user can process a partial payroll to arrive at the amount of either and ADVANCE or PREPAID check. A user can also process a partial payroll to print the actual check, or it can be hand-written.
Differences/similarities between
ADVANCE checks and PREPAID checks:
An ADVANCE check is keyed into
the system as a flat dollar amount through a designated menu option, and is
deducted from a timecard during a payroll process. The system calculates the taxes, deductions, and net
pay. There is a good chance that the employee
will receive an additional check. There
is also a chance the check could be written for too much money, and you will
get a negative net pay error during payroll.
A PREPAID check is keyed into
the system during payroll. YOU
tell the system what the taxes and deductions will be – the system does not
process an automatic calculation. There
is a good chance that taxes will not be same as those the system would have
calculated.
An ADVANCE check must be entered and posted to the system BEFORE timecards are entered. You will be signaled during timesheet entry to key the advance on the regular timecard screen.
A PREPAID check is entered
DURING timecard entry. There is a
separate data entry screen for the check data.
It gets posted to the system during the normal payroll update steps.
An ADVANCE is added to bank
reconciliation during when it is posted during the designated menu option.
A PREPAID check is added to bank
reconciliation during the “Print Check” option of a payroll process.
An ADVANCE check is tracked
through the employee’s personnel file, and the system will signal a warning if
you forget to deduct it.
A PREPAID check is not
anticipated by the system during payroll.
The user must remember to enter the check, or the dollars will not be a
part of the employee’s W2.
An ADVANCE check will not be
included in the calculation and accrual of payroll taxes.
A PREPAID check is included in
the calculation and accrual of payroll taxes.
To assist you in understanding
the handling of an advance, consider this example:
An employee claims to have
turned his timesheet in, but you cannot locate the timesheet and did not
process it in payroll, therefore, there is no paycheck for this employee this
week. You agree to issue an advance to
the employee in the amount of $200.00.
The employee completes a timesheet to replace the lost one. You will process these hours in next week’s
payroll.
An ADVANCE cannot be deducted
from a Holiday check.
A PREPAID cannot be keyed
against a Holiday check.
To
begin, on the “PayBill Master” menu, click [Timesheets].
The
screen will display:
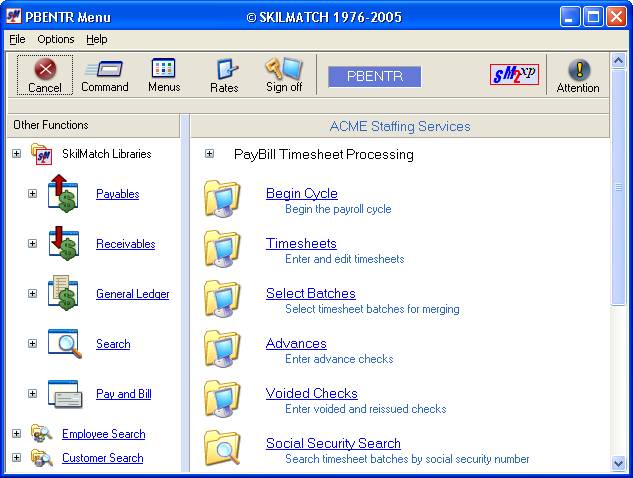
Click [Advances].
The screen will display:
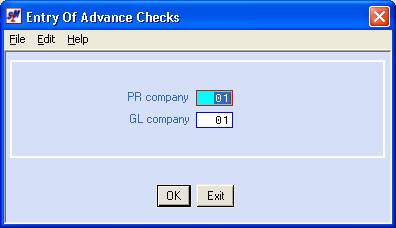
P/R Company Number:
Defaults to company 01. If you wish to enter advance check data for
a different payroll company, key the desired company numbers.
G/L Company Number:
Defaults to company 01. If you wish to enter advance check data for
a different general ledger company, key the desired company numbers.
To continue, click [OK].
To NOT proceed, click [Exit].
If you chose to NOT proceed, the
screen will display:

Click [OK]
to continue. You will be returned to
the “PayBill imesheet Processing” menu.
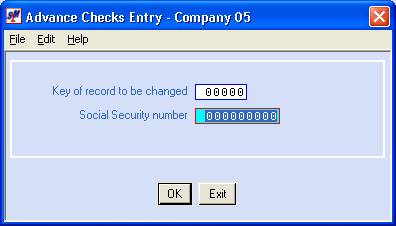
If you chose to proceed, the
screen will display:

Key Of Record To Be Updated:
If you have already entered an
advance check, and need to go back into it to make a change to it, or
completely delete the entry, obtain the KEY number from the edit, move the
cursor to this area, and key the desired KEY number. You can only update/delete advance check data that has not yet
been posted.
If you are entering a new
advance check, leave this area blank.
Social Security Number:
If you are entering a new
advance check, key the employee's social security number without dashes and
slashes.
To continue, click [OK].
To NOT proceed, click [Exit].
Refer to documentation below for further information on exiting
this option.
If you chose to proceed, the
screen will display:
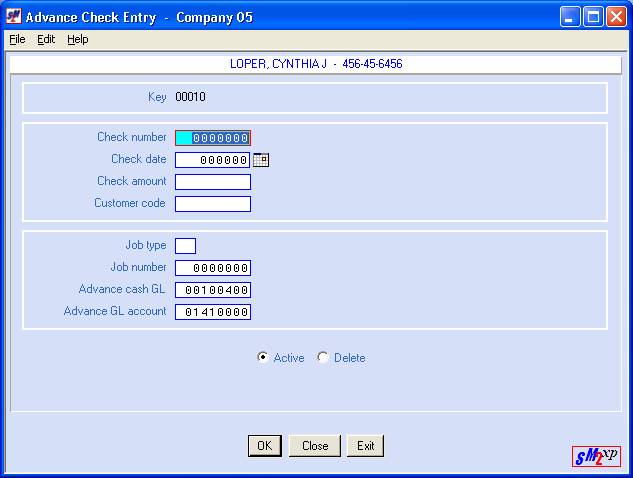
Check Number
Key the advance check number.
Check Date:
Key the advance check date, or
select a date by clicking the ![]() button (prompt and select button) to the
right of dates throughout SkilMatch2. The
button (prompt and select button) to the
right of dates throughout SkilMatch2. The ![]() button will display a calendar from which you
may click on a date to select, and then click [OK]
to key the date.
button will display a calendar from which you
may click on a date to select, and then click [OK]
to key the date.
Check Amount:
Key the amount of the advance
check.
Customer Code:
You should be able to leave this
area blank. If the system requires a
code, call SkilMatch for assistance.
Job Type:
You should be able to leave this
area blank. If the system requires a
code, call SkilMatch for assistance.
Job Number:
You should be able to leave this area blank. If the system requires a code, call SkilMatch for assistance.
Advance Cash G/L:
The default G/L cash account
number will display.
Note: make certain that the advance check you
wrote was written on the same account number as the one displayed here.
If the check was written from a
different account number, key the correct G/L cash account number.
Advance G/L Acct:
The default G/L advance account
number will display. This number should
not be changed from the default.
Active/Delete:
If you wish to DELETE this
advance, click Delete. A black dot will
appear next to your selection.
To NOT proceed and try again,
click [Close]. Your entry will NOT be accepted and you will
be returned to the social security number screen ready to try again.
To NOT proceed and NOT try
again, click [Exit]. Your entry will NOT be accepted and you will
be returned to the “PayBill Timesheet Processing” menu.
To continue, click [OK].
Your entry will be edited and you will be returned to the social
security number screen ready to enter the next advance.
Once you have finished keying
Advance Check information, click [Exit]. Once you click [Exit]
from the social security number screen, an edit report of all advances entered
will be produced. You should inspect
the edit for accuracy before continuing. Pay particular attention to the check
number, check date, and check amount.
If any of these items are keyed incorrectly you will have a big mess
when they get posted to the files!
Note: the advance(s) entered cannot be posted to the employee's file
and the bank reconciliation file until the edit displays the message "**
NO ERROR MESSAGES **".
The screen will display:
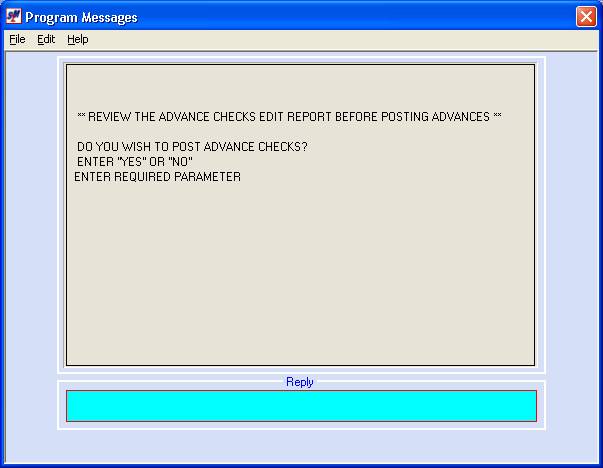
Do You Wish To Post Advance
Checks?
Note: all advances that
have been entered, but not posted, will be deleted when the next “Begin cycle”
is processed.
Inspect the edit! Check your totals, check dates and check
numbers for accuracy and make certain you have the right employee!
If everything on the edit is
correct, key YES and press (Enter) to post these advances.
If you see any mistakes on the
edit, key NO and press (Enter).
If you answered NO, the screen
will display:
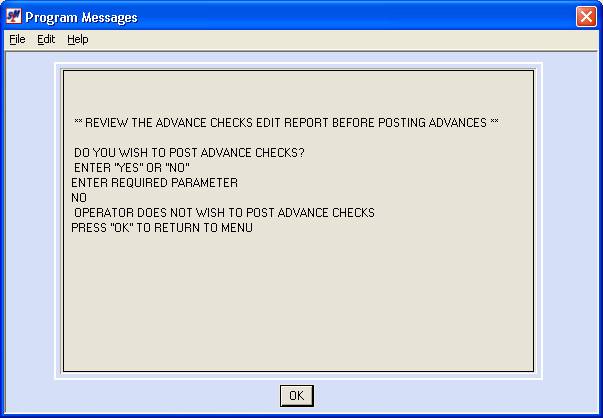
Click [OK]
to continue. You will be returned to
the “PayBill Timesheet Processing” menu.
If you answered YES, the
screen will display:
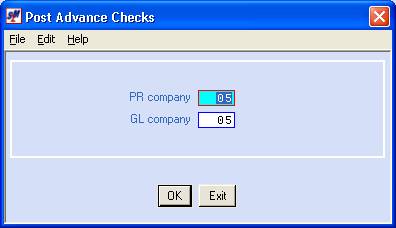
P/R Company Number:
The payroll company number
entered previously will display.
G/L Company Number:
The general ledger company
number entered previously will be display.
To continue posting the
advances, click [OK].
If you do NOT wish to post this
batch of advances, click [Exit].
Remember: advance check information that is entered, but not posted, will be deleted when a “Begin cycle” is processed.
If you chose to exit WITHOUT
POSTING, the screen will display:
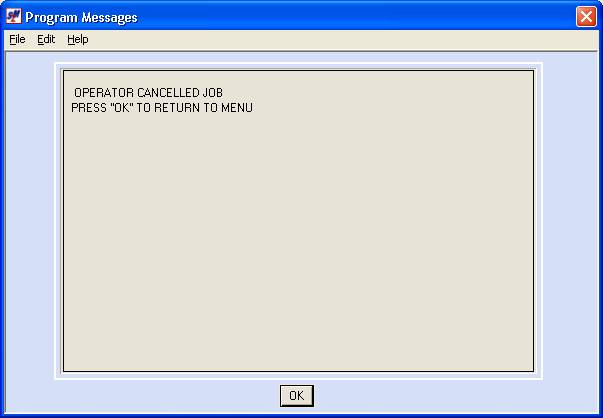
Click [OK]
to continue. You will be returned to
the “PayBill Timesheet Processing” menu.
If you chose to proceed, the
screen will display:
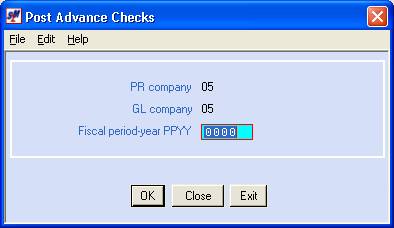
Fiscal Period/Year:
The last posting period used by
the selected G/L company number will display.
If you wish to post to a different fiscal period, key the desired
4-digit month and year (MMYY) to post these advances
To proceed with posting, click [OK].
To NOT post these advances to
this company and try again, click [Close]. You will be returned to the company number
screen.
To NOT post these advances at
this time, click [Exit]. You will be returned to the “PayBill
Timesheet Processing” menu.
Remember: advance check information that is entered, but not posted, will be deleted when the next “Begin cycle” is processed.
Once you posting the
Advance check(s), you will receive an Advance Check Register. As with all SkilMatch registers, this
register should be kept. We recommend
you keep Advance Check Registers with your other payroll reports/registers.