SELECTING
TIMESHEET BATCHES FOR MERGING
Individually named timesheet
batches, once they have passed the Edit, must be merged together into a single
timesheet file (referred to as the Merged Timesheet file) in order to produce
checks and/or invoices. Payroll is
processed on the Merged Timesheet file, not on individual batches. Even if all of your timecards are in a
single named batch, it must be converted into a Merged Timesheet file
before you can produce either checks or invoices!
It is possible to have
individually named batches in existence that should NOT be a part of the
current payroll, but reserved for a future payroll. These batches should be ignored during the current merge
selection. During a “Begin Cycle” the
Merged Timesheet file is deleted, but the individual, named batches will remain
intact. Individual batches will not
disappear. Each either gets merged at
some point, or manually selected for deletion.
If you plan to print checks
according to the order of entry of timesheets, then you must carefully plan the
merging of your batches. If you do NOT
plan to print checks according to the order of timesheet entry, you may select
batches for merging in any order you please since the timecards will be
re-sorted during the Print Check option.
Key
numbers and Batch names:
While
the timecards are in an individually named batch, they are numbered
sequentially in ten’s (key numbers 10, 20, 30, etc). Every batch has it’s own Key 10, for example. Once merged, however, the key numbers get
reassigned. The first named batch that
is merged will start with Key 10. The
second batch merged will pick up where the first batch left off, and so on.
If a
timecard in a named batch was marked for deletion, then during the merge it
gets removed, and the timecard behind it moves up a key number. For example, if there were 4 timecards in
the named batch (Keys 10,20,30,40), and if Key 20 was deleted in the named
batch, then the Merged file will have Keys 10, 20, 30. Named batch Key 30 becomes Merged batch key 20.
The
system will generate a report that lists the original named batches and their
key numbers, along with the re-assigned beginning and ending key numbers in the
merged file. You may print a Timesheets
in Process report for a list of the newly numbers timesheets.
Once an
individually named batch has been merged, it will disappear off of the list of
batches, and the ID (name) is free to be used again.
To
begin, on the “PayBill Library Master” menu, click [Timesheets].
The
screen will display:
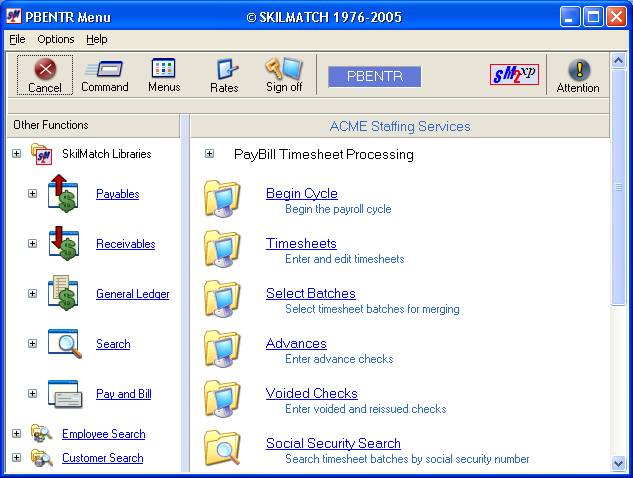
Click [Select
Batches].
The
screen will display:
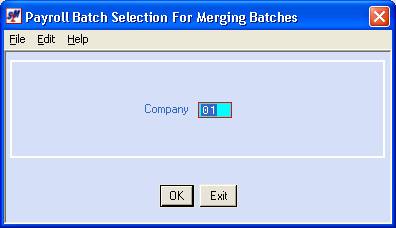
Company
Number:
Defaults to company 01. If you wish to merge timesheets for a
different company, key the desired company number.
To continue, click [OK].
To NOT proceed, click [Exit].
You will be returned to the “PayBill Library Master” menu.
If you chose to proceed, the
screen will display:
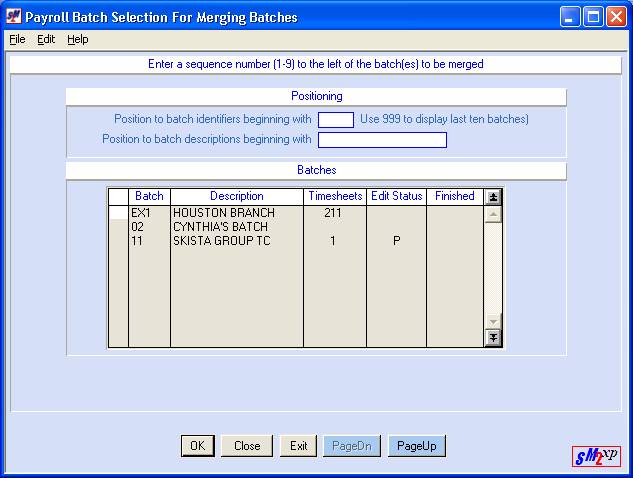
The system will display the name of every
batch, the batch description, number of timesheets in the batch, and the status
of the batch. You cannot select
a batch for merging unless a P displays in the Edit Status column.
The Finished column will display YES if the last person
who ended out of the batch indicated that it is complete and ready for
merging. The system will NOT restrict
you from merging a batch based on responses displayed in the FINISHED
column. It is simply a communication
tool for use between staff who are keying timesheets into batches, and the
staff person in charge of the merge.
Position
To Batch Beginning With:
Since the system displays batches
in order alphabetically, then numerically, and because the screen can display
only up to 10 batches, the batch you need to merge may not display on this
screen. Use the [PageDn] and [PageUp]
keys to locate the batch to be merged, or key up to three characters of the
batch ID and click [OK] to
locate the desired batch. To
“position to” again, <TAB>
to this field and key the desired batch ID.
To display the last 10 batches
in the entire list, key 999 in this field and click [OK].
Position
To Description Beginning With:
You may also locate a batch by
keying up to 15 characters of the batch description to which you wish to
position. Click [OK].
To “position to” again, <TAB> to this field and key the desired
batch ID.
To display the last 10 batches,
key 999 in this field and click [OK].
Select
Batches For Merging:
It is possible to have batches
in existence that should NOT be a part of the current payroll, but reserved for
a future payroll. These batches should
be ignored during the current merge selection.
During a “Begin Cycle” the Merged Timesheet file is deleted, but the
individual named batches will remain intact.
Individual batches will not disappear.
Each either gets merged at some point, or manually selected for
deletion.
Even though the screen can
display up to 10 batches, you may only select up to 9 batches to be merged at a
time. If you need to print checks in
particular order, then you should have keyed the timecards into the batch using
that order. Furthermore, if there is
more than 1 batch to be merged, you must number your batches very
carefully. For example, if you want the
checks from Batch 6 to print first, key 1 to the left of batch 6. Number each batch accordingly.
If you print checks in hold code
order or alphabetically, the order in which the batches are merged does not
matter since the system will re-sort the timecards during the Print Check
option.
Enter a sequence number (1-9) to
the left of each batch to be merged.
To merge the selected batches
into one, single batch (referred to as the Merged Timesheet file) for payroll
processing, click [OK]. You will be returned to the “PayBill Library Master” menu.
To NOT merge any batches for
processing payroll and try again, click [Close]. You will be returned to the company number
screen.
To NOT merge any batches for
processing payroll, and return to the “PayBill Library Master” menu, click [Exit].