MANUAL CHECK ENTRY
This option allows you to enter information from a manual check that pays
an invoice already in the system.
NOTE: If the
invoice is not yet entered in the system, you may enter the invoice and prepaid
check data through Menu Transactions,
Item Enter Invoices.
Before beginning, you will need the reference number that is
associated with the already-entered invoice that was paid. This can be obtained through Menu Disbursements,
Item List Payables, or off your A/P Ageing Report.
To
begin, select [Transactions] menu in the
Accounts Payable Library.
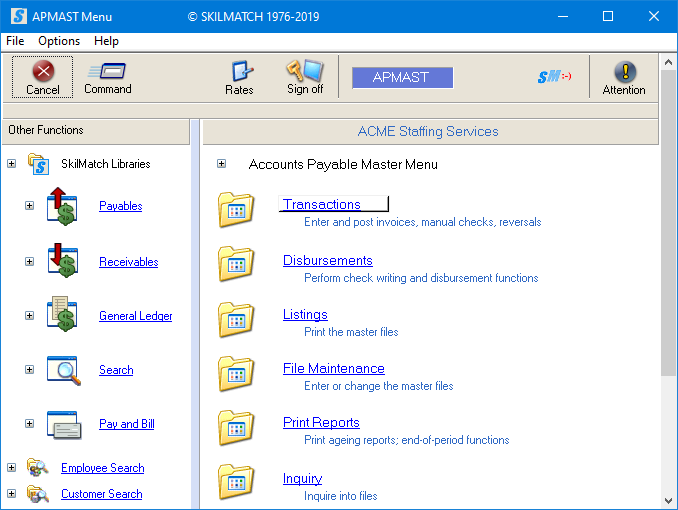
The
screen will display:
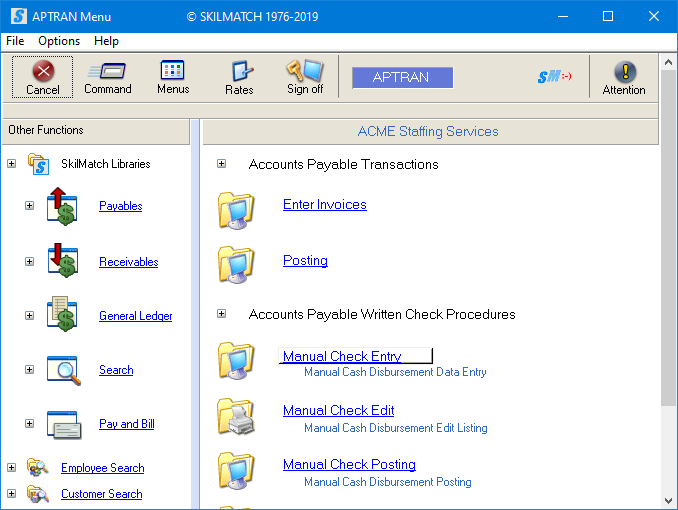
Click
[Manual Check Entry], the screen will
display:
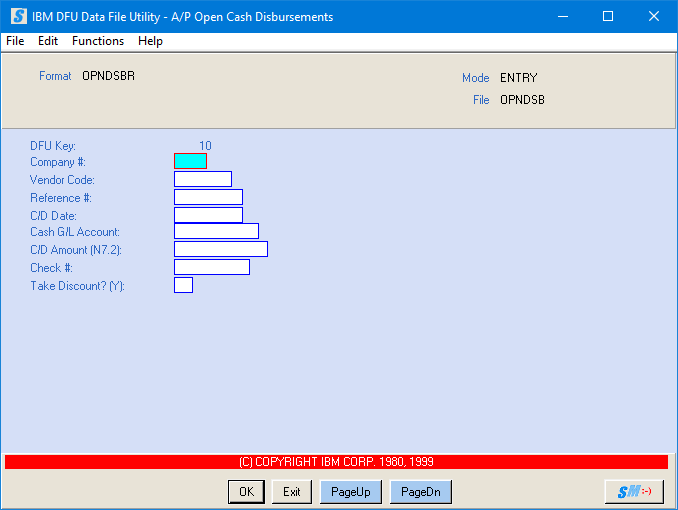
NOTE: Screen
displays in ENTRY mode if file is currently empty; otherwise, screen
displays in CHANGE mode.
NOTE: If the screen displays in CHANGE mode (upper right corner
indicates mode), click “Functions” and then select “Entry Mode”. Your screen
should display as above.
Company
#:
Key the desired company number.
Vendor
Code:
Key the desired vendor code.
Reference
#:
Key the reference number associated with the invoice that was paid.
C/D
Date:
Key the check date.
Cash
G/L Account:
If you have only one cash general ledger account, you may leave this area
blank. The default A/P cash account will
be used.
If you have more than one cash general ledger account, key the
appropriate cash account number.
C/D
Amount (N7.2):
Key the amount of the check.
Check
#:
Key the manual check number.
Take
Discount?:
If you wish to take the discount set up on the invoice, key Y.
OR
If you do NOT wish to take the discount set up on the invoice, leave this
area blank.
WAIT: Do NOT click [OK] at this time.
Review the information entered.
If you see any inaccuracies, move the cursor to the incorrect area, make
the changes, and then click [OK] to continue.
OR
If the information entered above appears accurate, click
[OK] to continue.
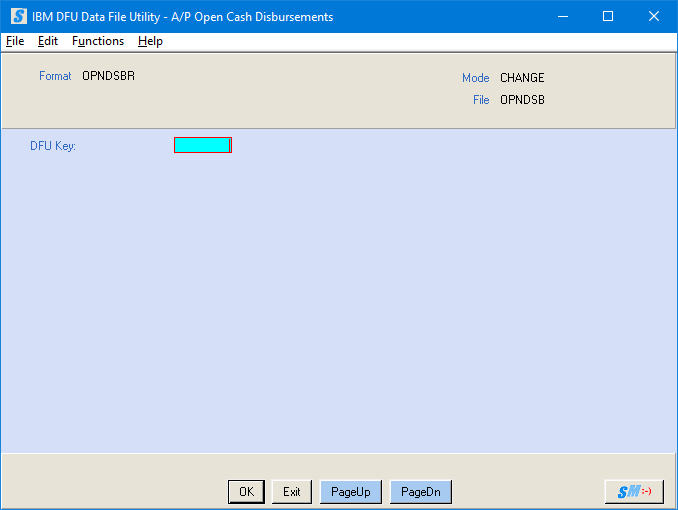
If
you select [OK] to continue, the entry
screen will display. Repeat the preceding steps for all manual
checks you wish to enter.
Upon completion of entry, click [Exit]
to end the job, the screen will
display:
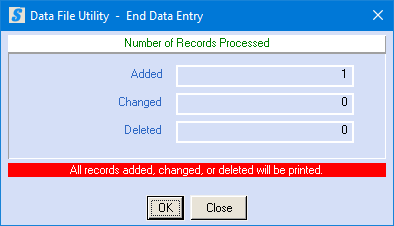
The number of records added, changed, and/or deleted will be displayed.
If you are finished entering manual checks, click
[OK] to return to the “Accounts Payable Transaction Processing” menu. The Cash Disbursements Edit Listing report
(AP220) will be produced. Refer to reports for further information.
OR
If you are NOT finished entering manual checks, click
[Cancel] to return to the data entry screen.
Repeat the above instructions until all manual checks are entered.
The Cash Disbursements Edit Listing report (AP220) will show the
reference number, check date, vendor number, vendor name, cash general ledger
account number, check amount, A/P general ledger account number, check number
and sequence number.
The bottom of the report displays the total cash disbursed, the total
number of checks, A/P distribution totals, and will notify you of any errors
that require correcting prior to posting.
NOTE: You may have errors on your edit.
Terminal
Errors:
These errors
will prevent the check from being posted. If any terminal errors appear on your edit,
you MUST correct or the system will not post the entries through Menu Transactions,
Item Manual Check Posting.
1) Invoice Number Not in
Open A/P File *** Will Not Be Posted - the invoice number entered for
this check does not match any invoice in the system. You either keyed an incorrect number, or have
not added the invoice to the system.
2) Deleted Invoice in Open A/P File *** Will
Not Be Posted - the invoice you are posting the check against has been
deleted from the file.
3) No Record in General Ledger Master File ***
Will Not Be Posted - the general ledger account number keyed has not
been set up as a valid account number.
4) No Discount Dollars Were Entered *** Will
Not Be Posted - you indicated with a ‘Y’ that the discount amount set up
on the invoice should be taken out of this check, but did not enter an amount
in the discount area on the invoice.
5) Discount Dollars Already Taken *** Will Not
Be Posted - the discount amount was taken on a previous check for this
invoice.
6) Deleted General Ledger Record *** Will Not
Be Posted - the general ledger account number used on this cash
disbursement has been deleted from the general ledger.
Informational
Errors:
These errors are informational only; the check will post anyway.
1) C/D
Amount Exceeds Invoice Balance--the check amount you have entered is
greater than the amount of the invoice.
(This cash disbursement WILL be posted).
2) Duplicate Check# in Bank Reconciliation File
*** Will Not Be Posted to Bank File - the check number already exists in
the bank reconciliation file and will not be added to bank rec, but the cash
disbursement will be posted to the general ledger.
3) Check Number Missing *** Record Not Added To
Bank File--you have entered a manual check without a check number, so
the check was not added to the bank reconciliation file.
4) The Following Company Number Is Invalid
- the company number keyed is not set up in the general ledger file. The company number may have been keyed
incorrectly.
5) Partial Payment - the amount you
entered is less than the amount of the invoice.
6) Vendor Number Not in Master File -
you have not set up a file for this vendor code, or have keyed the vendor code
incorrectly.
7) Deleted Vendor Number - this vendor
code has been deleted from the system.
8) C/D Month Invalid - you keyed a month
other than 1-12.
9) C/D Day Invalid - you keyed a day
other than 1-31.
10) C/D Year Invalid - you keyed an
invalid year.
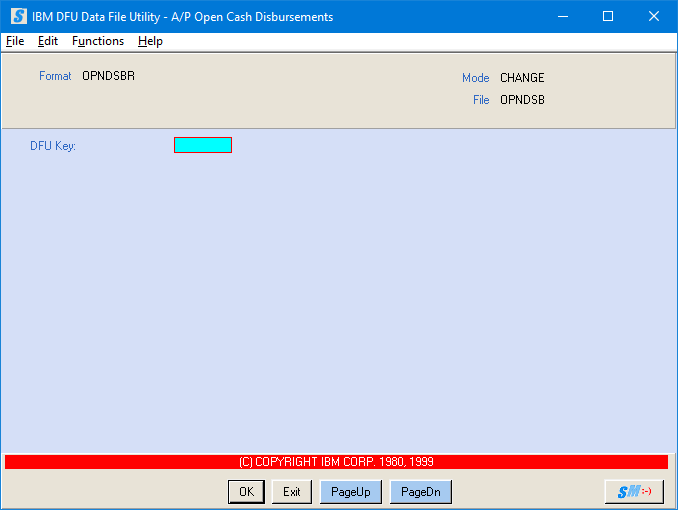
To correct terminal errors, go back into Menu Transactions, Item Manual
Check Entry.
The screen will display:
NOTE: If the screen displays in ENTRY mode (upper right corner
indicates mode), click “Functions” and then select “Change Mode”. Your screen
should display as above.
DFU
Key:
Key the reference number associated with the entry. This may be obtained from the edit report.
The selected record will display:
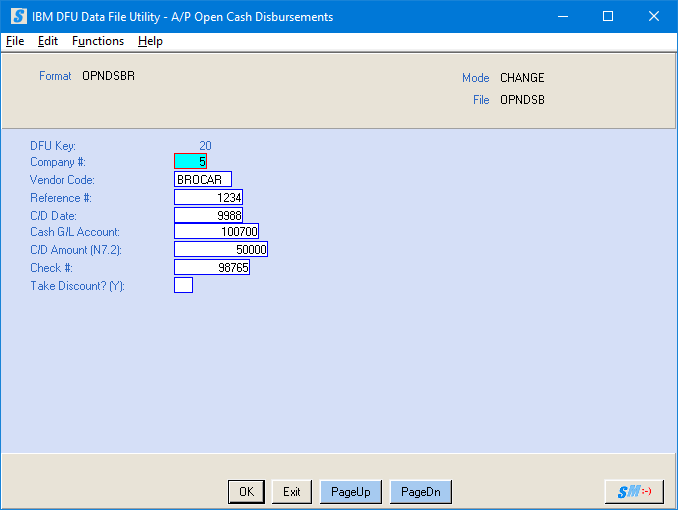
Make desired changes and
click [OK], the screen will display:
Repeat for any other
records that need to be changed.
When all changes have been made, click [Exit] to end the job.
The screen will display:
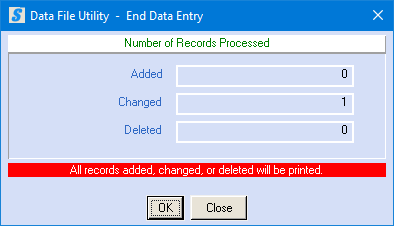
The number of records added, changed, and/or deleted will be displayed.
If you are finished making changes, click [OK] to
return to the “Accounts Payable
Transaction Processing” menu. The Cash
Disbursements Edit Listing report (AP220) will be produced. Refer to reports for
further information.
OR
If you are NOT finished entering manual checks, click
[Cancel] to return to the data entry screen.
Repeat the above instructions until all manual checks are
entered/changed.
Check
your reports before continuing
with posting using Menu Transactions,
Item Manual Check Posting.